
Configuring Microsoft Dynamics Marketing (MDM) Connector for CRM On-Premises/IFD
To set up the Microsoft Dynamics Marketing (MDM) Connector with CRM On-Premises/IFD, follow these steps:
- Configure CRM to Expose the CRM Certificate
- Install the Marketing Connector for Microsoft Dynamics CRM
- Set Up an ACS Namespace on Windows Azure
- Add the CRM Certificate to Azure Service Bus
- Configure MDM and Start Initial Synchronization
Step 1: Configure CRM to Expose the CRM Certificate
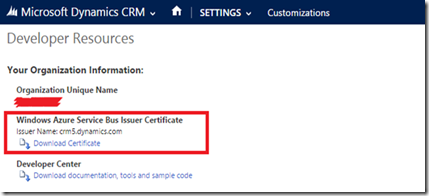
If you are using Microsoft Dynamics CRM Online, this step is not required, as CRM Online automatically exposes the certificate, as shown in the screenshot below.
Stay tuned for the next steps in the setup process!
Exposing the CRM Certificate for On-Premises & IFD
Once you complete the following steps, CRM On-Premises & IFD will successfully expose the certificate.
Prerequisites:
- A valid certificate issued by a trusted authority.
- System Administrator access on the CRM server.
Step 1: Install the Certificate
Install the certificate in the certificate store on the server running the Microsoft Dynamics CRM Asynchronous Service.
Note: If the CRM application and the Asynchronous Service are installed on the same server, this step is not required.
Step 2: Generate a Public Key File (Base64 Format)
- Navigate to Personal > Certificates and right-click on the certificate.
- Under All Tasks, select Export to generate a public key file in Base64 format.
Step 3: Grant Read Access to the Asynchronous Service User
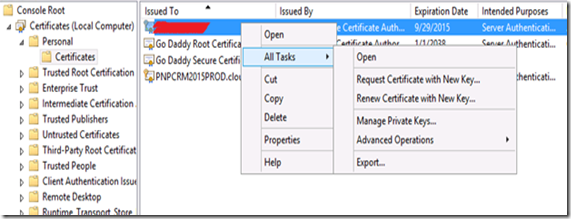
- Right-click the certificate and go to All Tasks.
- Select Manage Private Keys, as shown in the screenshot below.
This ensures the asynchronous service has the necessary permissions to access the certificate.
Next, grant read permissions to the user running the Asynchronous Service, as shown in the screenshot below.
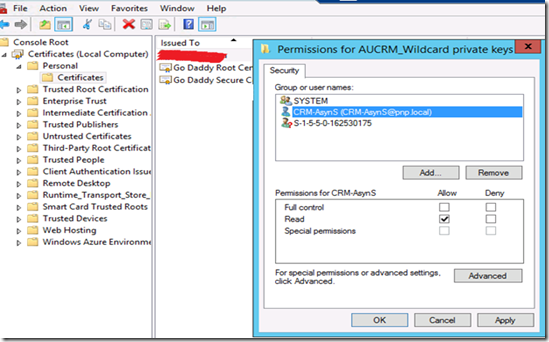
Granting Read Permission & Configuring the MSCRM_Config Database
In our setup, we assigned read permission to the “CRM-AsynS” user, as this is the account running the Asynchronous Service.
Step 1: Add the CRM PowerShell Snap-in
Run the following command in PowerShell to add the CRM snap-in:
Add-PSSnapin Microsoft.Crm.PowerShell
This command loads the CRM PowerShell module, which is registered during the CRM server installation.
Step 2: Set the CRM Certificate
Execute the following command to configure the CRM certificate:
Set-CrmCertificate –CertificateType AppFabricIssuer –Name <issuerName> -StoreName My –StoreLocation LocalMachine -StoreFindType FindBySubjectDistinguishedName –DataFile <certificateFilename>
- ssuer Name (<issuerName>) – Can be any name, but it must match the issuer name used when configuring Microsoft Azure Active Directory Access Control Service (ACS).
- DataFile (<certificateFilename>) – Specifies the path to the public certificate key file.
Step 3: Verify the Certificate
After completing these steps, the certificate will be successfully registered and visible in your CRM IFD environment, as shown in the screenshot below.
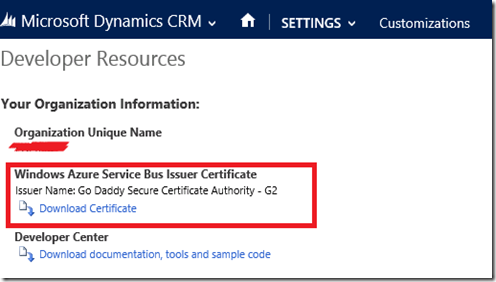
Before, performing the above steps, it was displaying as follows.
Install Marketing Connector for Microsoft Dynamics CRM:
- Download the Microsoft Dynamics Marketing CRM Connector and proceed with the installation.
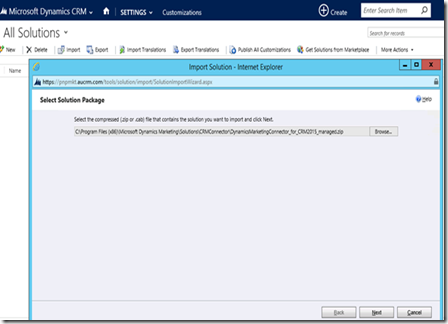
- Once the installation is complete, navigate to the installation directory to find the DynamicsMarketingConnectorSolution_managed.zip file, as shown in the screenshot below.
- In CRM, import the DynamicsMarketingConnector_for_CRM2015_managed.zip solution to complete the setup, as demonstrated in the screenshot.
This integration ensures seamless data synchronization between Microsoft Dynamics Marketing (MDM) and CRM.
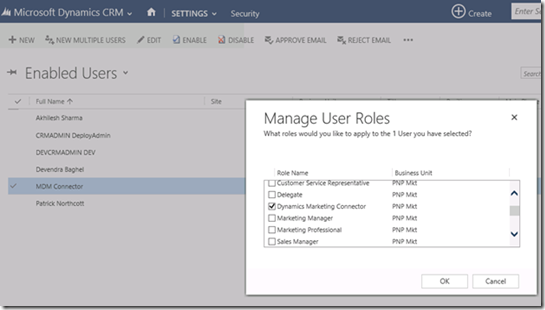
Assign the “Dynamics Marketing Connector” security role to the user configuring the connector, as shown in the screenshot below.
Configuring ACS Namespace on Windows Azure
To set up the ACS Namespace on Windows Azure, follow these steps:
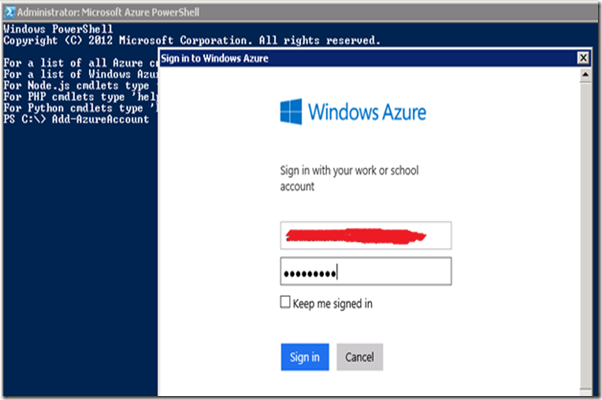
- Open PowerShell and add your Azure account by running the following command:
- Add-AzureAccount
- After executing the command, a login screen for Azure will appear, as shown in the screenshot below.
This step is essential for managing Azure services through PowerShell.
Creating the ACS Namespace in Azure
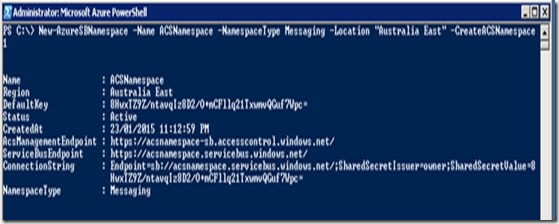
To create an ACS Namespace in Azure, run the following PowerShell command:
New-AzureSBNamespace -Name YOUR_NAMESPACE -NamespaceType Messaging -Location “YOUR_LOCATION” -CreateACSNamespace 1
This command sets up a Service Bus Namespace with ACS enabled, as shown in the screenshot below.
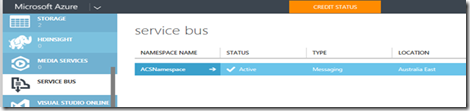
Then, it will create the Service Bus in Azure. As shown in the below screenshot.
Adding the CRM Certificate to Azure Service Bus
- Select your Service Bus in the Azure portal.
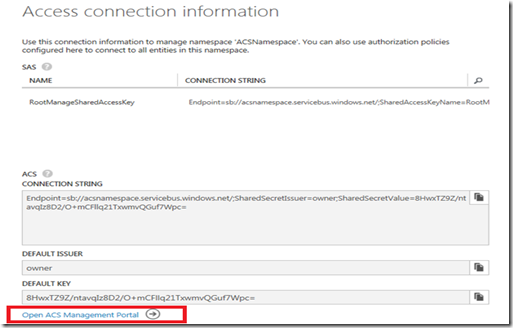
- Click on the “Connection Information” button.
- This will open the following screen, as shown below.
Adding the CRM Certificate to Azure Service Bus
Note: Copy the Default Key, as it serves as the Management Key required for configuring Microsoft Dynamics Marketing (MDM).
- Click on “Open ACS Management Portal” to access the ACS Management Portal.
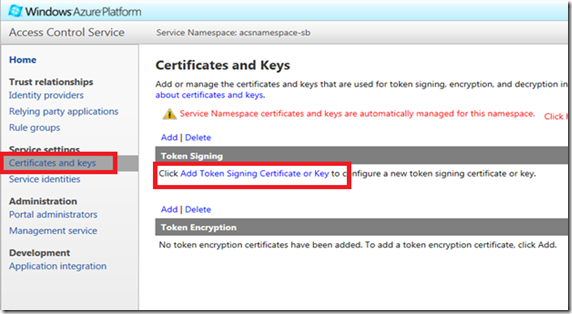
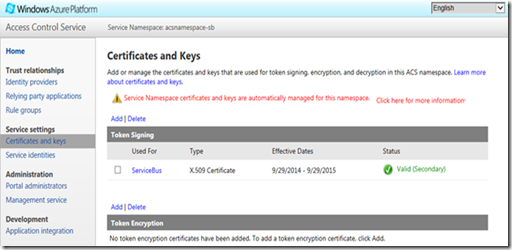
- In the portal, navigate to Certificates and Keys.
- Click on “Add Token Signing Certificate or Key” to upload the CRM certificate.
- The certificate must include both the public and private keys.
Refer to the screenshot below for guidance.
Importing the CRM Certificate in ACS Management Portal
On the “Add Token Signing Certificate or Key” page:
- Import your certificate by selecting the appropriate file.
- Enter the certificate password to complete the upload process.

After the wizard completes, your certificate will be displayed as follows.
Configuring MDM & Starting Initial Synchronization
To set up the MDM Connector, follow these steps:
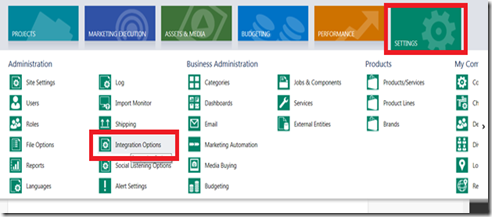
- Log in to Microsoft Dynamics Marketing.
- Navigate to Settings > Integration Options, as shown in the screenshot below.
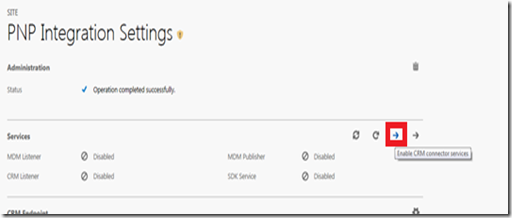
Now enable the CRM Connector Service, as shown in the below screenshot.
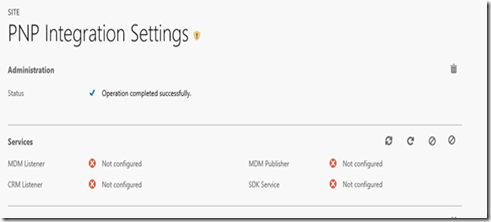
The action above will enable the services, as shown in the below screenshot.
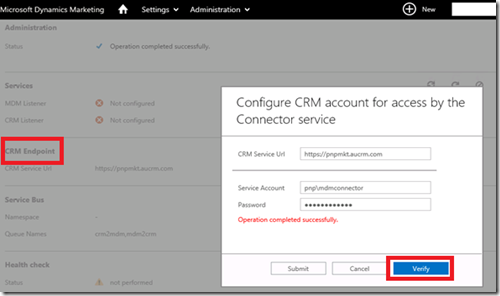
Now configure the CRM End Points. To do this, you will need to give the CRM Service User information. This user will be used for integrating the MDM and CRM.
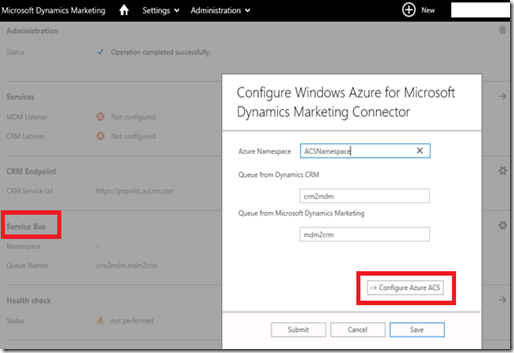
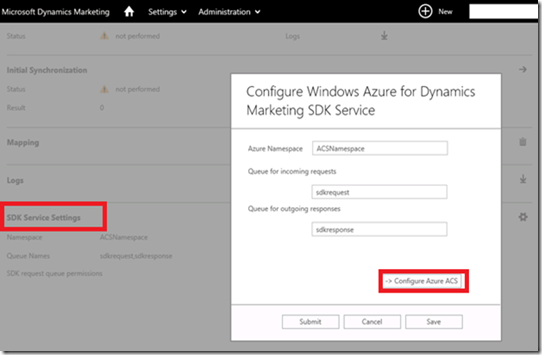
Configuring the Service Bus
Next, set up the Service Bus by entering the Azure Namespace.
Important: Do not modify the default names of the CRM or MDM queues, as shown in the screenshot below.
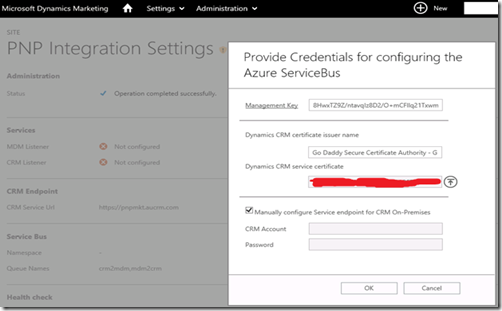
Configuring Azure ACS
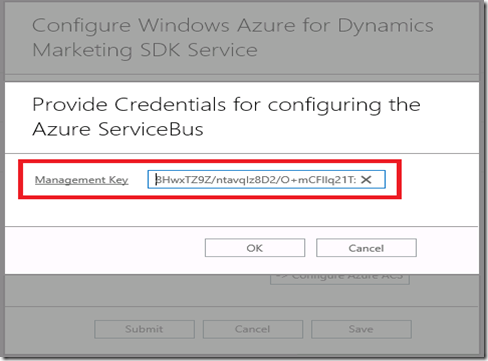
- Click on “Configure Azure ACS”.
- On the “Provide Credentials for Configuring the Azure Service Bus” page, enter the required details.
Management Key: Use the Default Key copied earlier when adding the CRM certificate to the Azure Service Bus.
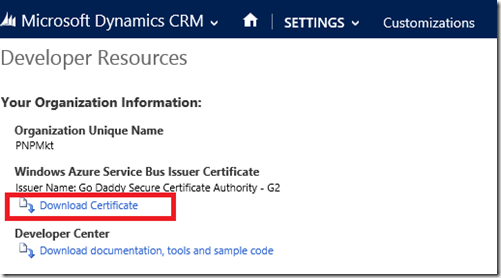
Configuring the Dynamics CRM Service Certificate
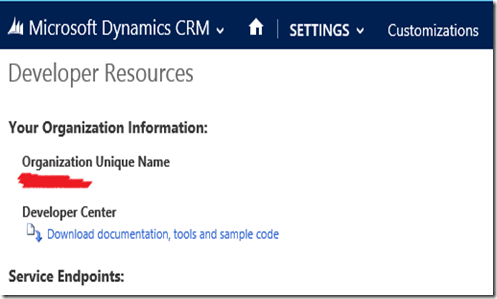
- Download the CRM certificate from the Developer Resources screen, as shown below.
- Import the downloaded certificate into the Dynamics CRM Service Certificate field.
This step ensures secure communication between CRM and Azure Service Bus.
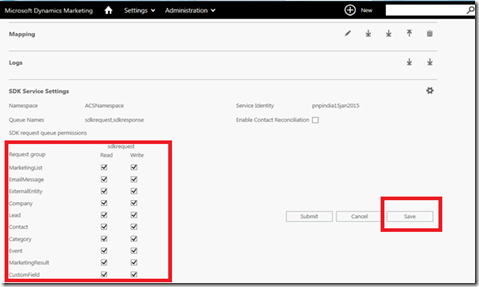
Now edit the SDK Service Settings, as shown in the below screen.
Next, click on “Configure Azure ACS.”
On the “Provide Credentials for Configuring the Azure Service Bus” page, paste the Management Key that was copied earlier when adding the CRM certificate to the Azure Service Bus.
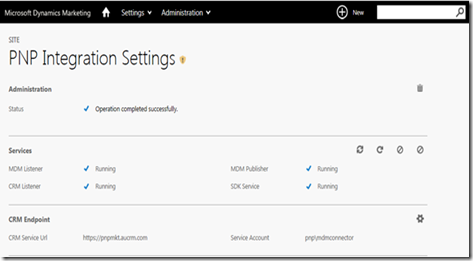
Now, it should start displaying that all the Services running, as shown below.
Now select appropriate options, and save the changes, as shown in the below screenshot.
Once the setup is complete, you can run a Health Check and initiate the Initial Synchronization, as shown below.
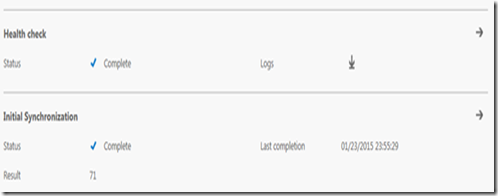
If you need to troubleshoot any issues with the MDM Connector, you can download the logs from the Log section on the Marketing Integration page, as shown below.

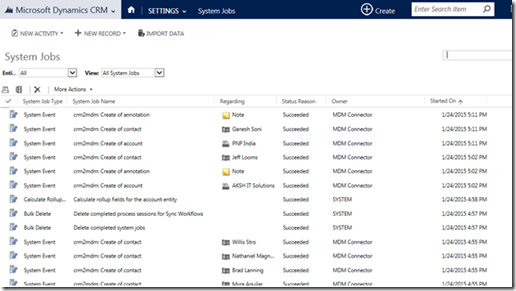
And from the CRM Side, you can view the System Jobs. As shown in the below screenshot.
We hope this guide helps you successfully configure the MDM integration with CRM!
For more information, visit our website www.ecleva.com, or feel free to reach out with any questions.